Scheduling
Cloudomation supports flexible and powerful means of repeatedly running a flow. If you want to set up a schedule without reading through the underlying concept you can refer to the custom scheduler. The custom scheduler comes with a wizard that helps you set up the schedules you need.
To better understand the full capabilities of scheduling with Cloudomation, simply read on.
Use Cases
Use a Schedule to
- Execute a flow in fixed or flexible time intervals (minutes, hours, days, weeks, months, etc...),
- Execute a flow on particular days of a calendar,
- Execute a flow in arbitrary complex intervals,
- Permanently poll a third party system.
Concept
Cloudomation separates
- the logic which ensures a flow is executed repeatedly (the Scheduler)
- the configuration how the flow should be scheduled (the Setting)
- the logic of the flow itself (the Flow)
- the resource which combines all this (the Schedule)
Using this separation it is possible to use the same scheduler logic (e.g. schedule something daily) for different flows with varying settings (e.g. scheduled at different hours)
As soon as a schedule is enabled Cloudomation will make sure that an active execution of the scheduler exists. If the scheduled execution fails or is cancelled, Cloudomation will re-start it for you.
Scheduler
A scheduler contains the script which implements logic to wait until the next iteration and start the flow.
A scheduler script should start the scheduled flow only once and then end. Cloudomation will take care to start the next iteration. In case of an error in the Scheduler script Cloudomation will wait one minute and start another iteration.
Cancelling a scheduled execution will also result in Cloudomation starting anther iteration after one minute. To stop the schedule, the schedule resource must be disabled or deleted.
import flow_api

def handler(system: flow_api.System, this: flow_api.Execution):
    """A simple scheduler script which starts the flow every minute"""

    # The execution receives the IDs of the referenced setting, flow,
    # and schedule resources.
    # In this example we'll only use the flow_id
    inputs = this.get('input_value')
    flow = system.flow(inputs['flow_id'], by='id')

    # wait one minute
    this.sleep(60)

    # start the flow
    this.flow(flow.get('name'))

    return this.success('all done')
Setting
The associated setting contains configuration options for the scheduler. Different schedulers can support different options. E.g. the number of minutes between two iterations, or the time at which to start the flow every day.
time: '09:00'
timezone: 'Europe/Vienna'
days_of_week: [1, 2, 3, 4, 5]
Changing the value of a setting which is used for a schedule does not immediately reload the changed values. It is best practice to restart the schedule after making any changes by disabling and enabling it.
Flow
The flow contains the script which is repeatedly executed.
A scheduler might pass context information to the flow execution. Which inputs are passed (if any) is up to the Scheduler script. The information passed can be used to have different behaviour in different iterations or for logging/audit purposes.
Here are some examples:
- The iteration counter
- A flag if the current day is a public holiday
- Email of the operator on shift
Schedule
The schedule links one scheduler with one setting and one flow. Note that using a setting is always necessary even if the scheduler does not have any configurable parameters (i.e. the whole scheduling logic is described within the scheduler). In this case you can use an empty setting. However, it is recommended that parameters are not hard-coded within schedulers but are instead stored in settings for flexibility and maintainability.
The schedule can be disabled or enabled. Once the schedule is enabled, Cloudomation will immediately start an execution of the scheduler script.
When a schedule is disabled, all currently running executions of the scheduler script are cancelled by Cloudomation.
Changing fields of a schedule does not immediately reload currently running scheduler executions. It is best practice to restart the schedule after making any changes by disabling and enabling it.
Complex schedulers
A scheduler script uses the same syntax as a regular flow script. This means that a scheduler can use arbitrary complex logic, connect to third party systems, and start child executions. Some examples:
- Connect to a calendar to check the next appointment time
- Check a weather API when some flow should only run after rain
- Analyse the status of other executions
- Check an email inbox
There are two recommendations to keep in mind when designing a scheduler:
- Separation of concerns
The scheduler should only contain logic needed to do the scheduling. The referenced flow on the other hand contains the logic which is scheduled.
- Reusability
A scheduler should be designed so it can be used for different flows.
Considering those points the examples above should rather be placed in the Flow which is schedlued, than in the scheduler.
Example schedulers
We provide several example schedulers as part of the Scheduling bundle.
Schedule with custom parameters
The custom scheduler gives you a lot of flexibility and ease of use. You can easily configure a schedule that e.g. runs a flow at noon every weekday that is not a public holiday and falls in Q2 of the year.
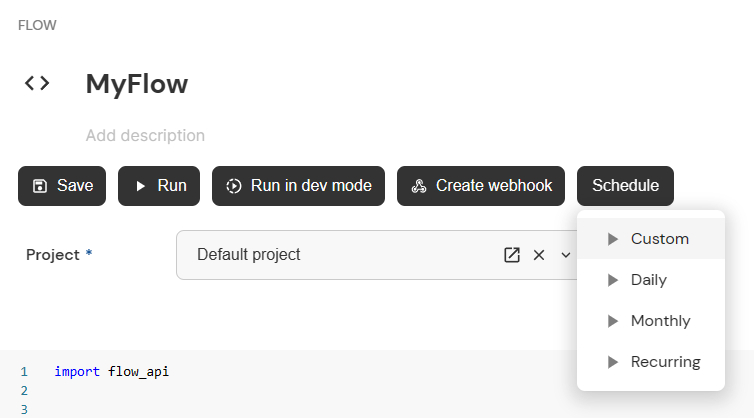
To set up a new schedule navigate to the flow that you want scheduled and start the process with the help of the plugin action, selecting Custom from the dropdown.

the plugin action in the flow
The form
The wizard will guide you through the configuration options in 4 pages. You can navigate between pages via the buttons in the form, the finalize button lets you skip to the end.
the buttons to navigate through the form
The pages are as follows:
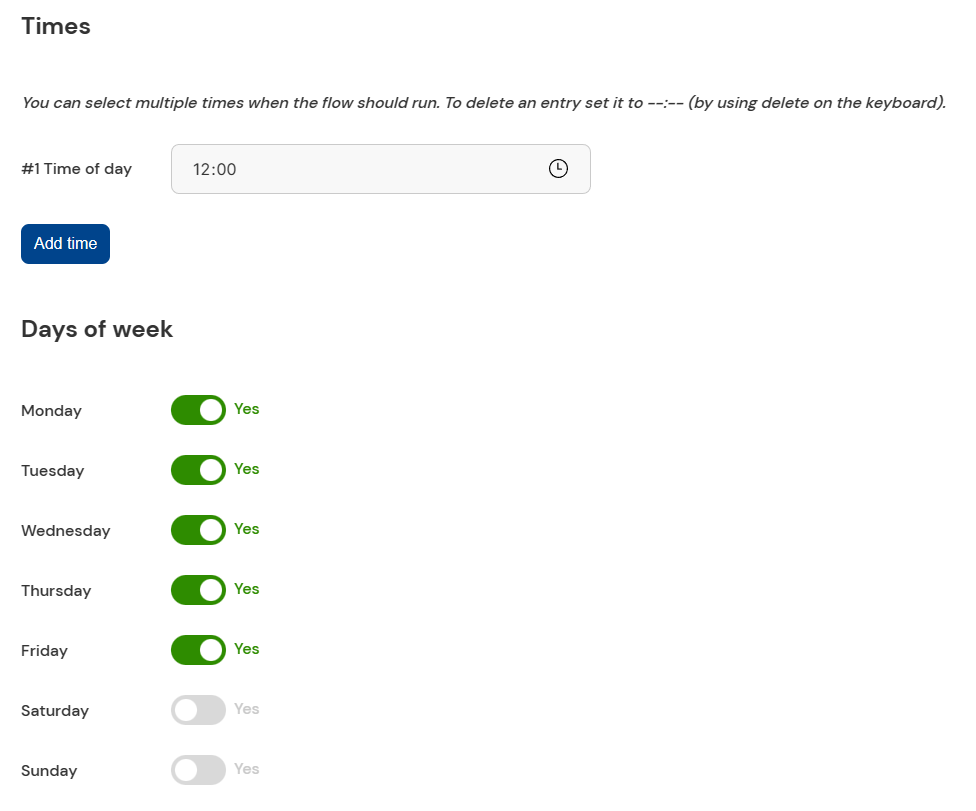
- Page 1 – Basic configuration (name of the schedule, times and days of week of execution)
- Page 2 – Extended configuration (months, calendar weeks, exceptions etc.)
- Page 3 – Miscellaneous (timezone information, additional inputs values etc.)
- Page 4 – Summary of the given inputs and the confirm button

times and days of week in the form
Once you are on the final page you can double check if the config is correct. With the submit button you start the schedule. To make sure that the schedule is up and running Cloudomation fetches running executions to look for the scheduled execution that you have just created.
Cloudomation searching for your scheduled execution
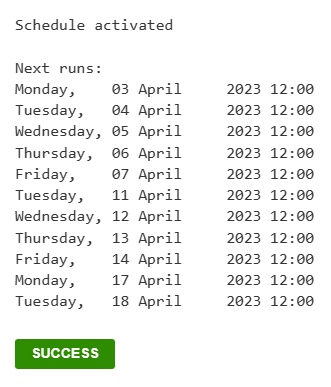
Once the scheduled execution is found Cloudomation gives you the OK. Additionally, you get an overview of the next runs, in our case the flow was scheduled for noon on Q2 weekdays that are not an Austrian public holiday.

the overview of the next runs
You have now successfully created and started a new schedule. To modify it navigate to the newly created schedule and use the toggle button to disable it or use the plugin action Change Custom Schedule to edit the configuration via the wizard.
As with every schedule, the schedule configuration is stored in a setting. The wizard helps you gather the information then writes it into the setting. To modify the schedule you can also head to the setting and change the values in the setting. Bear in mind that you have to disable then enable the schedule to apply the new configuration.
Configuration options
For the configuration options refer to the Included example schedulers.
Schedule recurring
Schedule a flow to run in recurring intervals
Configuration options
-
max_iterations: int = Noneif set, the schedule will disable itself once the number of iterations is reached
-
interval_seconds: int = 60how many seconds to wait between iterations
-
timezone: str = 'Europe/Vienna'the timezone to use for timestamps
-
input_value: dict = {}additional inputs passed to the flow
Schedule daily
Schedule a flow to run at the same time every day
This scheduler will correct for DST changes of the provided timezone.
Configuration options
-
max_iterations: int = Noneif set, the schedule will disable itself once the number of iterations is reached
-
time: str = '08:15'the time at which the flow is started daily
-
timezone: str = 'Europe/Vienna'the timezone to use for timestamps
-
input_value: dict = {}additional inputs passed to the flow