Git Integration
Using the git integration it is possible to synchronise the content of a git repository with Engine.
Use Cases
Generally it is recommended to store all your Engine resources in git. There are plenty of benefits:
- Use of your favourite offline editor
- Version history of all changes to your automation logic
- Collaboration between users easily possible
- An additional backup of your automation logic
- Branching, merging, rollback, ...
Concept
The legacy git integration (up to version 7) is not compatible with the git integration from version 8 and on. In version 8 both legacy and new git integration are supported. Beginning with version 9 the legacy git integration will be unsupported.
See here how to migrate to the new git sync.
The legacy git integration used to operate read-only. Meaning, no changes were made to a repository by Engine. From version 8 and on this changed to a two-way integration.
With git integration configured, all saved changes to resources in Engine are automatically synced to a remote repository that is provided by Engine as part of the workspace. This means, that whenever you change a flow script, enable or disable a schedule, rename a setting etc... a commit is generated and pushed upon saving. The author of the commit is your Engine user.
On the other hand, you can also make changes to resources in your local repository and upon committing and pushing, these changes will be reflected in Engine.
Scope of the synchronisation
You can set up the synchronisation for projects, bundles or the workspace. Only resources within the given project or bundle will be tracked. The git integration for the workspace tracks resources that are not part of a project or a bundle (e.g. users). Activities (such as executions or messages) are not tracked by the git integration.
Activities (e.g. executions or messages) are not tracked by the git integration.
Folder structure
Tracked resources can be found in the designated cloudomation-resources folder of the repository. Everything outside of this folder will be ignored by the git integration
and can be used for your own purposes e.g. readme files, templates, etc.
Initial Setup
Per default, the git integration is not set up. To enable the integration navigate to the project/bundle/workspace that you want to synchronize.
Setting up the remote repository
Choose the name of your branch (e.g. develop), write it into the field "Branch name", and save.

The field "Branch name", still empty.
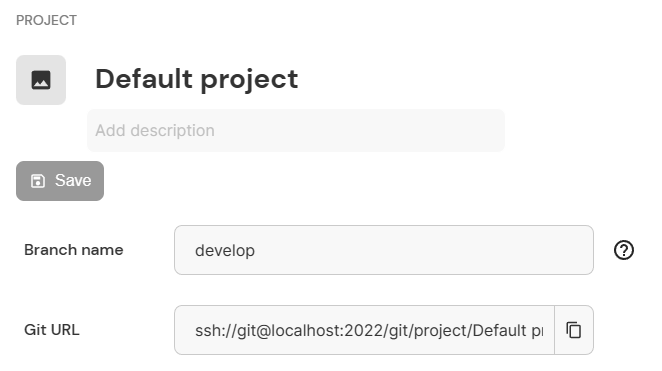
Upon saving a remote repository is created and the Git URL appears below the branch name.
From now on every change you make, that falls into the scope of the synchronisation, will be automatically committed into the remote repository.
Setting up the local repository
To set up the local repository you can clone the remote repository using the "Git URL".
Assigning your public key
Since the cloning uses SSH transfer protocol make sure that your Engine user has your SSH public key assigned.
You can check this by navigating to "Profile" -> "Edit profile". If there are no public keys listed you need to add the content of your public key.
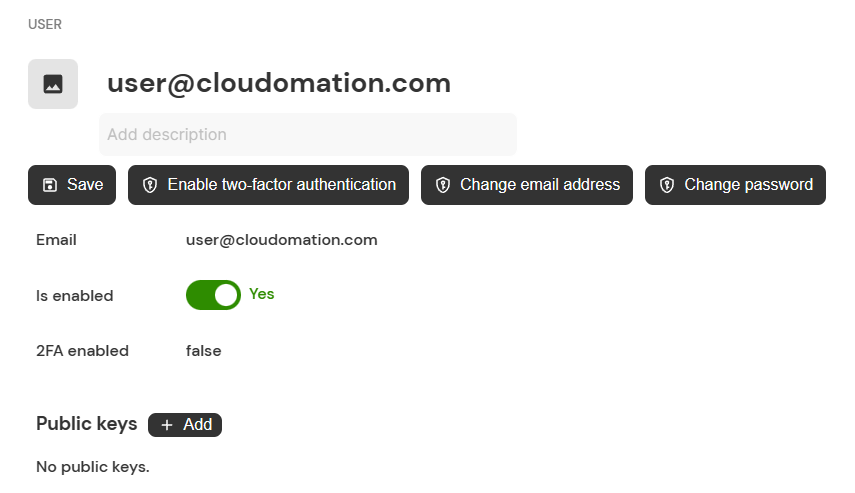
By clicking on "+ Add" you can assign your public key to your profile.
You will find your SSH public key under <your home directory>/.ssh/<filename>.pub. If you don't yet have SSH keys,
refer to SSH Keygen to generate them.
Never publish your SSH private key. Make sure to assign the public key to your user.
Cloning the remote repository
Once your user has your public SSH key assigned you can create the local repository by cloning the remote.
This can be done on the command line or you can use the Repository Cloning feature of your offline editor (if it has one).
The git URL is automatically put into quotes if the URL has spaces or special characters, so the command line handles it correctly.
Tools like VSCode or TortoiseGit handle quotes differently and might run into an error like fatal: protocol ''ssh' is not supported.
In this case remove the quotes from the URL after copying it.
- open a command line in the folder where you want to create the local repository
- execute the
git clonecommand with the git URL as parameter. E.g.:
git clone "ssh://git@localhost:2022/git/project/Default project.git" Default
Once you have your local repository you can make changes locally, commit and push them to the remote repository. These changes will then be reflected in Engine.
Configuration
Disabling the git integration
To disable the synchronisation for a resource click on "Remove git repository" in the options menu of the resource.

The button to disable the git integration
If you disable the git integration for a resource, the remote repository will be automatically deleted.
Changing branches
If you are working with multiple branches locally you can change which branch gets synced with Engine. The required steps for changing branches in Engine is illustrated in the following example:
Let's assume that you have 2 branches locally prod and develop. In Engine your project is currently synced with prod. Now you want to sync Engine with develop
so you can test out new features.
- First, you need to change the "Branch name" on your project to
develop. - Fetch & pull changes in your local repository in the branch
develop. You'll see a commit on top with the message "Reexport whole content".
This commit contains the content of the branch prod since in Engine the resources are still the ones from prod. In the next step we revert this commit
so the branch develop is clean again.
- Run
git revert HEAD. - Push your local branch
developto the remote repository.
Your project in Engine is now synced with the branch develop.
Re-synchronising the remote and local repository (needed after renaming a project/bundle/workspace)
Renaming a synchronised project/bundle/workspace automatically changes the URL of the remote repository. To ensure that you can push changes from your local repository to the remote repository, you need to adjust the remote path of your local repository accordingly.
Let's assume that you have a git enabled project called My project. The corresponding URL is ssh://git@localhost:2022/git/project/My project.git.
You decide to rename the project to My new project. The URL automatically changes to ssh://git@localhost:2022/git/project/My new project.git.
Here's how you can adjust the remote of your local repository to reflect this change:
- open a command line in the folder where your local repository is
- (optional) you can display the current remote with the
git remote -vcommand
$ git remote -v
origin	ssh://git@localhost:2022/git/project/My project.git (fetch)
origin	ssh://git@localhost:2022/git/project/My project.git (push)
- change the remote to the new URL
$ git remote set-url origin 'ssh://git@localhost:2022/git/project/My new project.git'
- display the remote to confirm that the change is successful
$ git remote -v
origin	ssh://git@localhost:2022/git/project/My new project.git (fetch)
origin	ssh://git@localhost:2022/git/project/My new project.git (push)
Migration from earlier versions
This section is relevant if you're upgrading to Engine version 8 and up from version 7 (or earlier).
Switching to the new git integration can be done in a few steps:
- Disable legacy git configs to avoid conflicts between the legacy and new git integration.
- Set up the new git integration as seen here.
Since the migration involves setting up a new repository, your commit history is not automatically transferred to the new repository. This doesn't affect the functionality of the git integration. If you'd like to keep the git history, you'll find how to do so below.
Restoring Git History (Optional)
To restore the git history, you can force push your old repository to your new local repository. This copies all content of the old repository (including commit history) to the new local repository.
Since the legacy git integration consisted of a single repository for the entire workspace, you need to make sure, that only the relevant content ends up in the new repositories (the new git integration has 1 repository for each project). The example below guides you through this process.
Force-pushing causes irreversible changes in a git repository. Make sure you understand the steps before executing them.
- open a command line in your new repository (it should only have 1 commit that initialised the repository)
- get the commit sha of the initial commit, it will be needed later.
# in the new repository
git rev-parse HEAD
- get the name of the current branch, it will be needed later (
mainin our example)
# in the new repository
git branch --show-current
- create and checkout a new branch called
repo-content
# in the new repository
git checkout -b repo-content
- open a command line in your old repository
- execute the
git pushcommand with a parameter for the URL of the new local repository, a parameter for specifying the name of the source and target branch (the current branch in the old repo e.g.releaseand the branch name you got at step 3), and the flag-f.
# in the old repository
git push /path/to/repo/ release:main -f
- checkout <branch-name> (
mainin our example) again in the new repository.
# in the new repository
git checkout main
- delete all content in the new repository and commit it (example commit message:
delete all content prior to reinitialising).
# in the new repository
rm -r /path/to/repo/*
git add .
git commit -m "delete all content prior to reinitialising"
- cherry-pick the original initialising commit using the sha from step 2.
# in the new repository
git cherry-pick <commit-sha>
- push the new local repository with the now re-established history
# in the new repository
git push -f
- repeat for all new repositories