Example: Building a Web-App in Cloudomation
Cloudomation can be used in many different ways. Apart from being an automation engine, it can also act as a backend for your applications. This page portrays the creation of a simple to-do web-application.
Our to-do app should help with keeping track of things that need to be done. For this, the user needs to be able to add and remove items to the to-do list and also mark them as done or not done.
Concept
Three Cloudomation resources that are used in this example:
- A setting that stores the id, label and status (done/not done) of our to-dos.
- A flow script that stores the HTML source code and interacts with the aforementioned setting.
- A webhook that provides the URL for displaying the web-app in a browser.
The flow
The logic behind the web-app is described in the flow. The two main parts of the flow are the HTML source code and the handler function that interacts with the setting and returns an HTML response.
import uuid
import chevron
import flow_api
MAIN = '''
<html>
<head>
<title>Cloudomation TODO</title>
<style>
body {
display: flex;
flex-direction: column;
align-items: center;
}
button {
cursor: pointer;
font-size: 20px;
}
input {
font-size: 20px;
padding: 0 10px;
}
.todo-list {
display: flex;
flex-direction: column;
width: 500px;
border: 1px solid lightgray;
border-radius: 8px;
background: lightyellow;
}
.todo-new {
padding: 10px;
display: flex;
justify-content: space-between;
}
.todo-item {
padding: 10px;
border-top: 1px dashed gray;
display: flex;
justify-content: space-between;
}
.todo-label {
border: 0;
background-color: transparent;
}
.todo-label-done {
text-decoration: line-through;
}
</style>
<script>
async function post(url, data) {
return await fetch(
url,
{
method: 'POST',
headers: {
'Content-Type': 'application/json',
},
body: JSON.stringify(data),
}
);
}
const todoNew = () => {
const newTodoLabel = document.getElementById("new-todo-label").value;
post('', { 'action': 'todoNew', newTodoLabel })
.then(() => {
window.location.reload();
});
};
const todoDone = (id) => {
post('', { 'action': 'todoDone', id })
.then(() => {
window.location.reload();
});
};
const todoUndone = (id) => {
post('', { 'action': 'todoUndone', id })
.then(() => {
window.location.reload();
});
};
const todoRemove = (id) => {
post('', { 'action': 'todoRemove', id })
.then(() => {
window.location.reload();
});
};
</script>
</head>
<body>
<h1>Cloudomation TODO app</h1>
{{#debug}}
<pre>
method: {{method}}
json: {{json}}
path: {{path}}
query: {{query}}
</pre>
{{/debug}}
<div class="todo-list">
<div class="todo-new"><input type="text" id="new-todo-label" placeholder="What needs to be done?" /> <button onclick="todoNew()">add</button></div>
{{#todos}}
<div class="todo-item">
{{^done}}
<button class="todo-label todo-label-todo" onclick="todoDone('{{id}}')">☐ {{label}}</button>
{{/done}}
{{#done}}
<button class="todo-label todo-label-done" onclick="todoUndone('{{id}}')">☑ {{label}}</button>
<button class="todo-remove" onclick="todoRemove('{{id}}')">remove</button>
{{/done}}
</div>
{{/todos}}
</div>
<div>{{count}} TODOs</div>
</body>
</html>
'''
def handler(system: flow_api.System, this: flow_api.Execution):
inputs = this.get('input_value')
method = inputs['method']
store = system.setting('todo-store')
try:
todos = store.get('value')
except flow_api.ResourceNotFoundError:
todos = []
if not todos:
todos = []
if method == 'POST':
json = inputs['json']
action = json.get('action')
if action == 'todoNew':
todos.append({
'id': str(uuid.uuid4()),
'label': json['newTodoLabel'],
})
elif action == 'todoDone':
todos = [
{
**todo,
'done': True,
}
if todo['id'] == json['id'] else todo
for todo
in todos
]
elif action == 'todoUndone':
todos = [
{
**todo,
'done': False,
}
if todo['id'] == json['id'] else todo
for todo
in todos
]
elif action == 'todoRemove':
todos = [
todo
for todo
in todos
if todo['id'] != json['id']
]
store.save(value=todos)
return this.success('all done')
data = {
'count': len(todos),
'todos': todos,
}
return this.webhook_html_response(
chevron.render(MAIN, data)
)
The setting
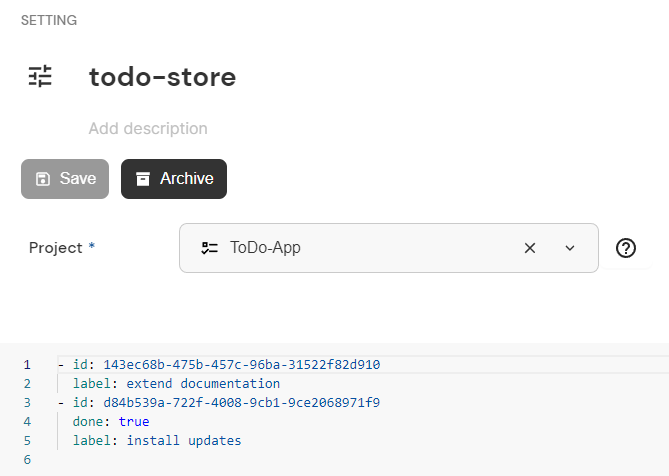
For storing information about the current state of our to-dos, we can use a setting. As displayed in below screenshot, the setting called 'todo-store' contains information about the two items appearing in the web-app.

The setting
The webhook
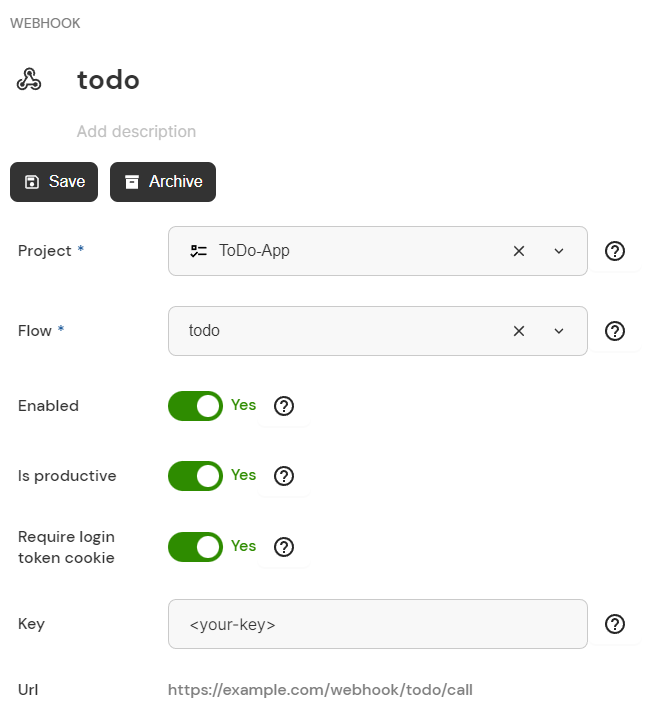
The final piece is the webhook that provides the URL for the web-app.

The webhook
Do you want to build it yourself?
A step-by-step guide for creating this web-app
If you would like to try this functionality the following guide will help you with the necessary steps.
- Create a new flow (in our example it is called 'todo') and copy the script seen above. There is no need to create a setting, since this is taken care of in the flow script.
- Create a new webhook that calls the newly created flow. To do that, simply open your flow script and click the "create webhook" button. onfigure the webhook as seen in the above screenshot. Note that a key and the URL are automatically generated for you.
- Follow the URL provided by the webhook. In case that the webhook uses a key, you need to add that to the URL (e.g.:
<URL\>?key=<your-key\>)
Alternatively, you can use this download package that contains the flow and the webhook packed into a project. For importing this into your Cloudomation workspace please refer to Importing records.
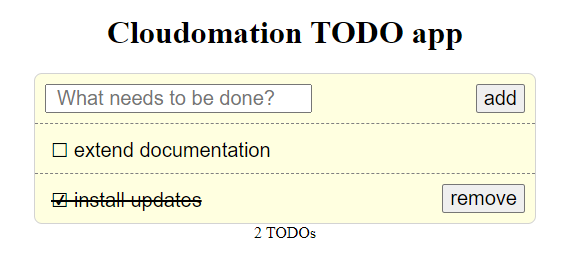
Using the URL in the webhook leads to the newly developed web-app where we can add and remove to-dos, as well as mark them as done/not done.

The interactive web-app as displayed in the browser